

Royal icing transfers offer a great way to quickly add designs to a baked creation. The hardened royal icing can be piped in a myriad of designs and applied to baked goods like cakes, cookies, and cupcakes. They keep at room temperature for up to 3 weeks, and can be made ahead to add detail and layers to any baked dessert. Below are the basics of royal icing transfers, as well as some additional resources for finding royal icing transfer designs.
Step 1: Lay a sheet of parchment paper on a rimmed baking sheet.
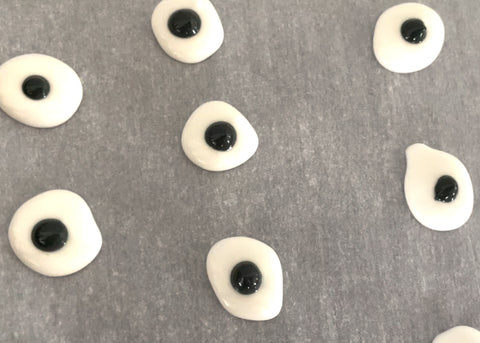
Step 2: Pipe your designs onto this sheet. If piping many of the same designs, it may help to print out a sheet of paper printed with the repeated design so that you can trace the pattern with your piping bag. Move the icing around with a toothpick or scribe to ensure that you're getting the shape and coverage you need.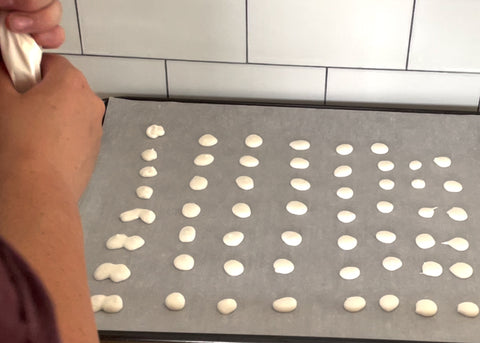
Step 3: Let the transfers firm up in a dry, room-temperature location for about 24 hours, or until they can be easily removed from the parchment paper.
Step 4: Once you're ready to apply the royal icing designs to your cookie, simply pipe a dot of medium-stiff royal icing onto the back of your transfer and adhere to your cookie (or cake--these work great for cakes and cupcakes too!). It's easiest to adhere the royal icing transfers when the base frosting or icing on your dessert is still wet and hasn't fully set up.
Tips for royal icing transfers:

There you have it! Practice makes perfect with royal icing transfers, but once mastered they are an essential tool in any dessert artist's toolbox. Below are a few of our favorite places to get royal icing transfer pattern sheets:
Sugar Dot Cookies
The Cookie Countess
The Flour Box
The Colorful Cookie
